Selasa, 06 Desember 2011

Home Energy Credits Still Available for 2011


IRS Tax Tips:

There is still time this year to make energy-saving and green-energy home improvements and qualify for either of two home energy credits.


The Nonbusiness Energy Property Credit is aimed at homeowners installing energy efficient improvements such as insulation, new windows and furnaces. The credit is more limited than in the past years, but can still provide substantial tax savings.

• The 2011 credit rate is 10 percent of the cost of qualified energy efficiency improvements. Energy efficiency improvements include adding insulation, energy-efficient exterior windows and doors and certain roofs. The cost of installing these items does not count.

• The credit can also be claimed for the cost of residential energy property, including labor costs for installation. Residential energy property includes certain high-efficiency heating and air conditioning systems, water heaters and stoves that burn biomass fuel.

• The credit has a lifetime limit of $500, of which only $200 may be used for windows. If the total of nonbusiness energy property credits taken in prior years since 2005 is more than $500, the credit may not be claimed in 2011.

• Qualifying improvements must be placed into service to the taxpayer’s principal residence located in the United States before January 1, 2012.

Homeowners going green should also check out the Residential Energy Efficient Property Credit, designed to spur investment in alternative energy equipment.

• The credit equals 30 percent of what a homeowner spends on qualifying property such as solar electric systems, solar hot water heaters, geothermal heat pumps, wind turbines, and fuel cell property.

• No cap exists on the amount of credit available except for fuel cell property.

• Generally, labor costs are included when figuring this credit.

Not all energy-efficient improvements qualify for these tax credits, so homeowners should check the manufacturer’s tax credit certification statement before they purchase. Taxpayers can normally rely on this certification statement which can usually be found on the manufacturer’s website or with the product packaging.
 
Eligible homeowners can claim both of these credits on Form 5695, Residential Energy Credits. Read more at www.irs.gov.

Entryway Arrangement Tutorial

As many of you know, I grew up in Mississippi on a large piece of property outside the city of Laurel. Every Christmas (even before Martha Stewart made it cool), my family would go out on our property and cut fresh greenery to decorate with during the holidays -  wild magnolia and bay leaf, holly, cedar and other evergreens, wild pyracantha and even chestnuts.  I grew up watching my mother create some of the most stunning arrangements you can imagine.  We used all different kinds of containers from large french baskets to galvanized oval shaped tubs.  So, decorating for Christmas brings back lots of wonderful memories for me, and I just love the process. 

I mentioned last week I would show you how to put together a large arrangement for your home like the one I did for Christmas Count Down.  Here's the final arrangement I made for the night.

And, here it is on my buffet in my dining room.  I changed out the branches for sandblasted manzanita branches to give me the look I wanted for my dining room, but it's the same arrangement.


Large arrangements are much easier to make than you think.
In general, remember "the rule of 3's."  There are three types of greenery, three types of ribbon,  three types of ornaments and the entire arrangement is laid out in a triangle.


Create a base layer by bunching up some burlap.  I bought mine on a random trip to Hobby Lobby.  It's just cut yardage, so I folded the cut edges under.

Select a container with some height.  I've had this container for years, and I use it for lots of different occasions.  It was an investment at the time, but I'm so glad I have it.

For a wire container, line it with moss and then place a water tight container in the center filled with floral foam that's been soaked in water.  As an aside, when soaking your floral foam, fill up a basin with fresh clean water and drop the foam in - that's it - do NOT push it down to submerge in the water, let gravity fill the foam properly)

Use floral stick tape to secure the foam to the bowl.

Every well designed arrangement includes something tall, fullness in the middle and something draping.  (another rule of three).  I like to start with the tall, I placed three large branches in the center making sure they're angled out a bit to provide space for the ornaments.

I added the draping element - these branches were from a very sun deprived scotch pine in my mother-in-laws yard!  It's a little difficult to see (b/c I'm not a great photographer), but I have grouped these draping branches to form a triangle.


Then I filled in around the base of the branches with large magnolias to cover the bowl, foam etc.  The shiny leaves are a nice contrast.   Again, I grouped them in three clusters to form another triangle.

Then, I filled in with some cedar just to draw your eye up to the the ornaments on the branches


Almost finished!  I added some ribbon to create a contrast in color with the greenery.  I used three different ribbons with three different textures.  I think when you cut all the greenery out of your yard (or a friend's yard!) you can splurge a bit on the ribbon.

Final step, I placed ornaments on the branches in a sparse way - three different kinds.  Don't over do it or it begins to looks like a hot mess!


Lastly, I added something special to the table - packages of Christmas cards from years past.  I've been collecting Christmas cards from each year since I got married.

During the season, John and I will pick a night to sit down with a glass of wine and go through some of the bundles.  It's always fun to see how people change and families grow.

I hope this encourages you to try an arrangement of your own! Have a great week.  M.

Senin, 05 Desember 2011

Interior Design Ideas Bathroom By Tim Stephens


Interior Design Ideas Bathroom by tim stephens

Interior Design Ideas Bathroom by tim stephensInterior Design Ideas Bathroom www.homedesign-ideas.com tim stephens

Let's go Shopping: Hudson Boston

I was off to an early morning client meeting to discuss accessories early today, I'm scrambling to finish up a wonderful project for a client before 12.31. They are having New Year's Eve celebration, so we're trying to button everything up in time. (Fingers crossed everything is done). 
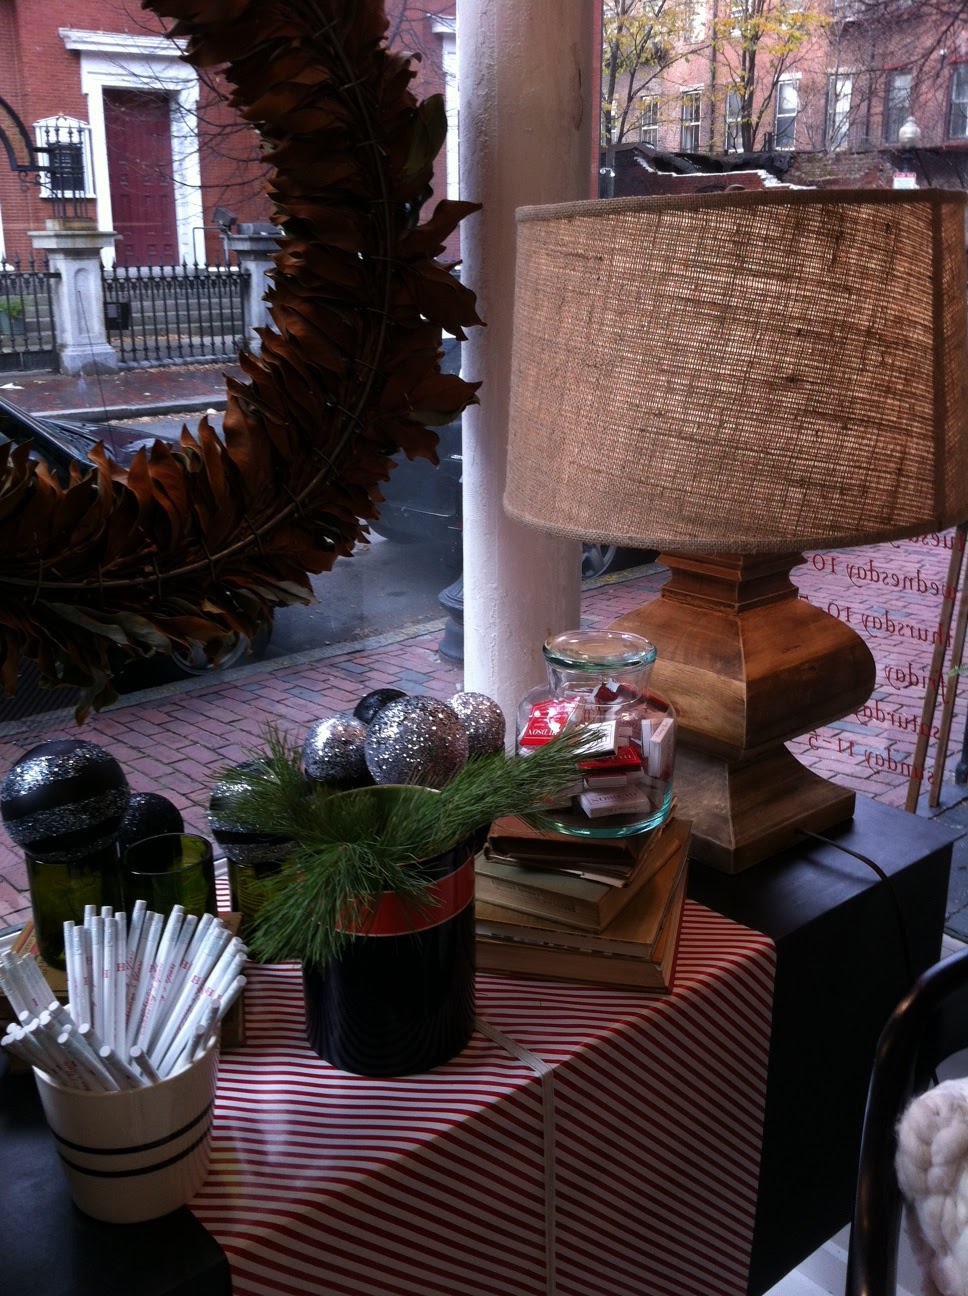
After my meeting I swung by Hudson-Boston. It's one of my favorite stores for furniture, lighting, accessories and one of a kind finds. They recently relocated to a new location on 12 Union Park Street in the South End of Boston. The new digs are fabulous, it feels a bit more like a home, then a shop. It's filled with cozy nooks, great vignettes and fabulous furniture! I could move right in or better yet move half the store out to my place! I ended up picking up a few holiday gifts, so if you're in the area, I'd recommend stopping by Hudson this holiday season, they have lots of goodies for you and everyone else or your list!
This gorgeous hand painted de Gournay mural is the first thing you see upon entering the shop. 
Holiday Vignette

Love the striped ceiling
Possible tray for client living room ottoman?? 
I've always wanted to use this design on a stair rail!! Someday!


It's Monday

Since life is feeling a bit like this for me at the moment . . . 

I thought some eye candy was in order - just to get our week started on the right foot!  These are just a few of the images I've saved for some heart stoppin' goodness.   They are random rooms from many different sources; but each one makes me pause and sigh.  


Now get out there and seize your day! M.


Minggu, 04 Desember 2011

Small Spaces, Laundry & Bathroom | Merinda Garrett, Interior Designer (small Blooper).MOV


Small Spaces, Laundry & Bathroom | Merinda Garrett, Interior Designer (small blooper).MOV

Small Spaces, Laundry & Bathroom | Merinda Garrett, Interior Designer (small blooper).MOVInterior Design of Small Spaces for Inner City Dwellers...

Sabtu, 03 Desember 2011

Bathroom Project


Bathroom Project

Bathroom ProjectSchool assignment: Design your own bathroom. First make collages that present you and after that abstract them. From that, make sure your bathroom ...